By: Elizabeth Obigwe, B.Sc. Anatomy. Freelance Writer; with medical review and editorial support by the DLHA Team
First Aids Skills to Learn for Saving Lives
To manage an emergency effectively, you need to be able to stay calm and think clearly as these situations are usually sudden and can be shocking. In addition to mastering self-control in the face of an emergency, there are several actionable skills that you need to acquire and would help you to save someone in common emergency situations.
Aside from increasing survival rates, training lay people on first aid skills has been shown to decrease the cost of care at public health level [1].
Unfortunately, some countries in sub-Saharan Africa do not have standard national programs and policy to train their nationals on basic first aid skills.
To contribute to an increased level of awareness and knowledge of first aid among individual Africans, this article will discuss four important skills you need to learn to save someone in an emergency.
Additional skills like how to control bleeding, help a choking or drowning victim, etc., are described elsewhere.
If someone has a cardiac arrest, suddenly collapses, or becomes unresponsive and is not breathing normally, doing CPR on them can help maintain circulation until professional medical help arrives.
Performing CPR often requires that you give rescue breaths. However, if you do not want to give rescue breathes for any reason, it is better to perform hands-only CPR than to do nothing. This involves 100 to 120 uninterrupted chest compressions per minute until help arrives.
However, hands-only CPR is not advisable for children and infants. It is essential to give them rescue breaths because their cardiac arrest is typically a result of oxygen deprivation rather than cardiac issues, resulting in depleted oxygen levels.
Similarly, when an adult becomes unresponsive due to choking, a near-drowning incident, or any other situation that can lead to oxygen deprivation, it is best to perform CPR with rescue breaths rather than hands-only CPR.
Check here to learn how to perform CPR.
Click to watch the video below to learn how to perform adult CPR.
How to perform adult CPR. Click image to watch video

How to perform jaw thrust and head tilt-chin lift during rescue breathing. Click on image to enlarge.
As stated earlier, rescue breaths are often given together with CPR to get air into the victim's lungs if they cannot breathe by themselves. Follow these steps to give rescue breaths;
Watch the video below to learn how to perform rescue breathing only without CPR
.
How to perform adult rescue breathing. Click image to watch video
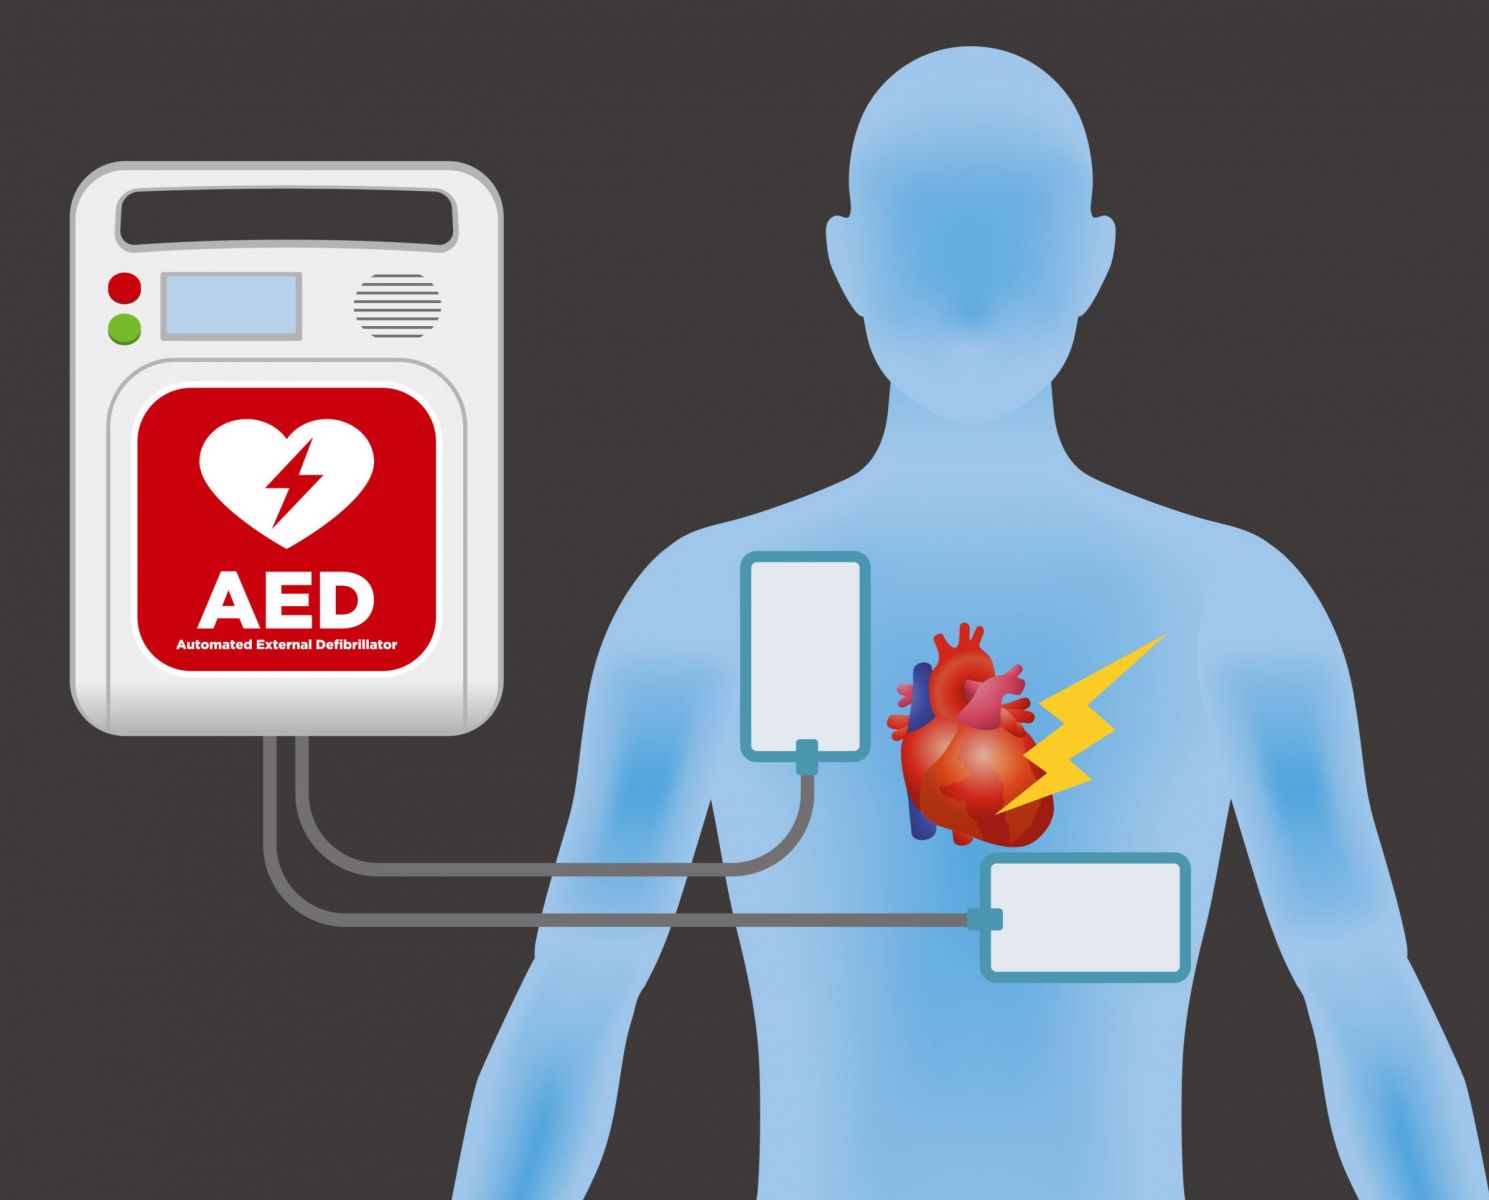
A representation of the correct positioning of AED pads on an adult.
An automated external defibrillator is a device used to administer electric shock to the heart of a person with cardiac arrest. The aim is to help the heart resume its normal rhythm. So if someone has a cardiac arrest and there is an AED within reach, you should use it. Below are the steps to follow;
Watch the video below to learn how to use an AED
How to Use An AED on an adult or child. Click on image to watch video.
Before trying to administer any first aid in an emergency, it is crucial to quickly assess the victim for signs of life. This can help you decide the most appropriate first-aid treatment to give. The primary signs of life include responsiveness, normal breathing, and circulation (pulse).
To check for responsiveness, gently tap the victim's shoulder and shout, "Hello, Are you okay?", or say “Hello, I am (your name), Can you hear me? Open your eyes”. Look for any movement, groaning, attempt at eye opening or verbal response. If no response, to your voice command, next check for the patient’s response to pain by pinching the ear lobes moderately and check for any movements to locate and remove the source of the pain.
If there is still no response, next check the airways for signs of breathing
Normal breathing involves regular, effortless breaths. Abnormal breathing might be gasping or shallow breaths. To check if the victim is breathing normally, use the head-tilt/chin-lift manoeuvre to open the airway, then observe the chest for movement. You can also place your ear near the victim's mouth and nose, and listen for breath sounds or check if you feel air movement on your cheek for about 10 seconds.
If the person is not breathing, call for help (either using your open mobile phone or shout to nearby people to call the local emergency service). In the meantime, quickly check the unresponsive person’s pulse and for any sign of bleeding before beginning CPR.
The presence of a pulse indicates that the heart is still pumping blood. One of the easiest pulse sites to check is the carotid artery. To check the pulse, locate the carotid artery by placing two fingers (not your thumb*) on the victim's neck, to the side of the windpipe. Press gently and feel for a pulse.
Other recommended sites for checking pulses, especially in infants are those of the femoral artery located in the groin area (where the thigh meets the lower abdomen) and the brachial artery located on the inside of the upper arm, between the elbow and shoulder. [4, 5].
If there is a pulse and the victim is breathing, place them in recovery position and keep monitoring their vital signs until help comes. It is recommended to check every 2 minutes.
If there is no breathing or abnormal breathing and no pulse, begin CPR immediately. Also, if you are unsure about the pulse and the victim is unresponsive, begin CPR.
Time is of the essence in an emergency so do not spend more than 10 seconds checking the pulse.
* You shouldn’t use your thumb because the thumb has its pulse which may interfere with the victim’s pulse.
Watch the video below to learn how to check for signs of life/ do a danger assessment.
How to perform primary survey in adults and children in an emergency. Click image to watch video.
In the absence of organised national training programs in your country, individuals should make it their responsibility to learn how to manage emergencies. Reading resources, watching demonstrations and practising these skills can help prepare you for emergencies. You may not feel very confident when faced with a real-life situation but do your best to stay calm and act as fast as possible. It is better to try than to do nothing at all.
1. Delaney PG, Eisner ZJ, Bustos A, Hancock CJ, Thullah AH, Jayaraman S, et al. Cost-effectiveness of lay first responders addressing road traffic injury in Sub-Saharan Africa. Journal of Surgical Research. 2022 Feb;270:104–12. doi:10.1016/j.jss.2021.08.032. Available from here
2. Obigwe E. How to save a life in an emergency (tips for Africans). DatelinehealthAfrica. [Internet, 2024 May]. Cited 2024 May 20. Available here.
3. Jones AR, Miller J, Brown M. Epidemiology of trauma-related hemorrhage and time to definitive care across North America: Making. The case for bleeding control education. Prehospital and Disaster Medicine. 2023 Oct 2;38(6):780–3. doi:10.1017/s1049023x23006428. Available from here.
4. Sarti A, Savron F, Ronfani L, Pelizzo G, Barbi E. Comparison of three sites to check the pulse and count heart rate in hypotensive infants. Pediatric Anesthesia. 2006 Jan 23;16(4):394–8. doi:10.1111/j.1460-9592.2005.01803.x. Available from here
5. Zimmerman B, Williams D. Peripheral pulse. NIH National Library of Medicine. [Internet, 2023 April]. Cited 2024 May 21. Available here.
Related: How to Save A Life in an Emergency (Tips for Africans)
Published: June 24, 2024
© 2024. Datelinehealth Africa Inc. All rights reserved.
Permission is given to copy, use and share content for non-commercial purposes without alteration or modification and subject to source attribution.
Video # 3: How to use an AED video link:
Video # 4: Primary survey video link:
DATELINEHEALTH AFRICA INC., is a digital publisher for informational and educational purposes and does not offer personal medical care and advice. If you have a medical problem needing routine or emergency attention, call your doctor or local emergency services immediately, or visit the nearest emergency room or the nearest hospital. You should consult your professional healthcare provider before starting any nutrition, diet, exercise, fitness, medical or wellness program mentioned or referenced in the DatelinehealthAfrica website. Click here for more disclaimer notice.